
If you’ve switched to Affinity Photo 2 from a different graphics editor, like me, then you might get confused of its functions from time to time.
It gets a little bit of getting used to, trust me I know, but in the end you realize that it’s just a walk in the park.
Finding out how to save your images as JPEG felt the same for me. Because it’s not called Save As in Affinity Photo. But the solution was simple.
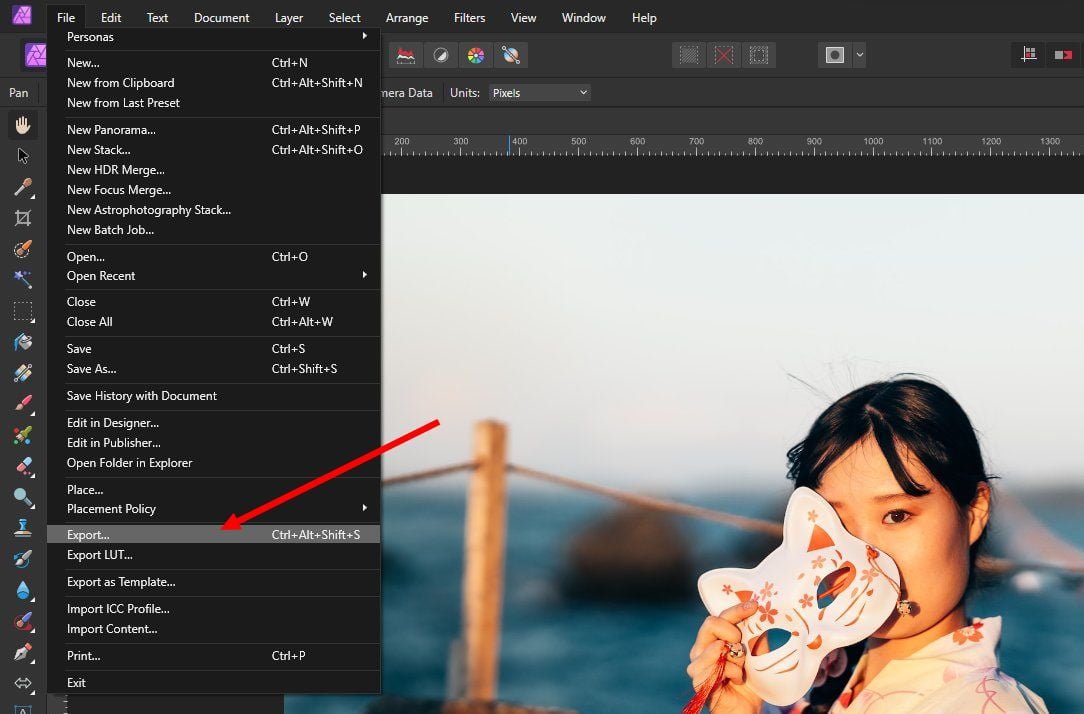
To save an image as JPEG in Affinity Photo, all you have to do is navigate to the File menu and select the Export option. This opens the Save As dialog box for you to save your file.
But there’s an easy way to access this dialog box. Let me show you how it’s done.
How To Save As JPEG
As I mentioned earlier, you can easily save as JPEG or any other format by accessing the dialog box from the File menu. However, this process could get tedious after a while, especially when you have multiple files to save.
The easiest way to save as JPEG in Affinity Photo 2 is to press the S key on the keyboard while holding down the Control or Command Key together with Shift and Alt keys. This will immediately bring up the Save As dialog box for you to easily save your image with just a few clicks.
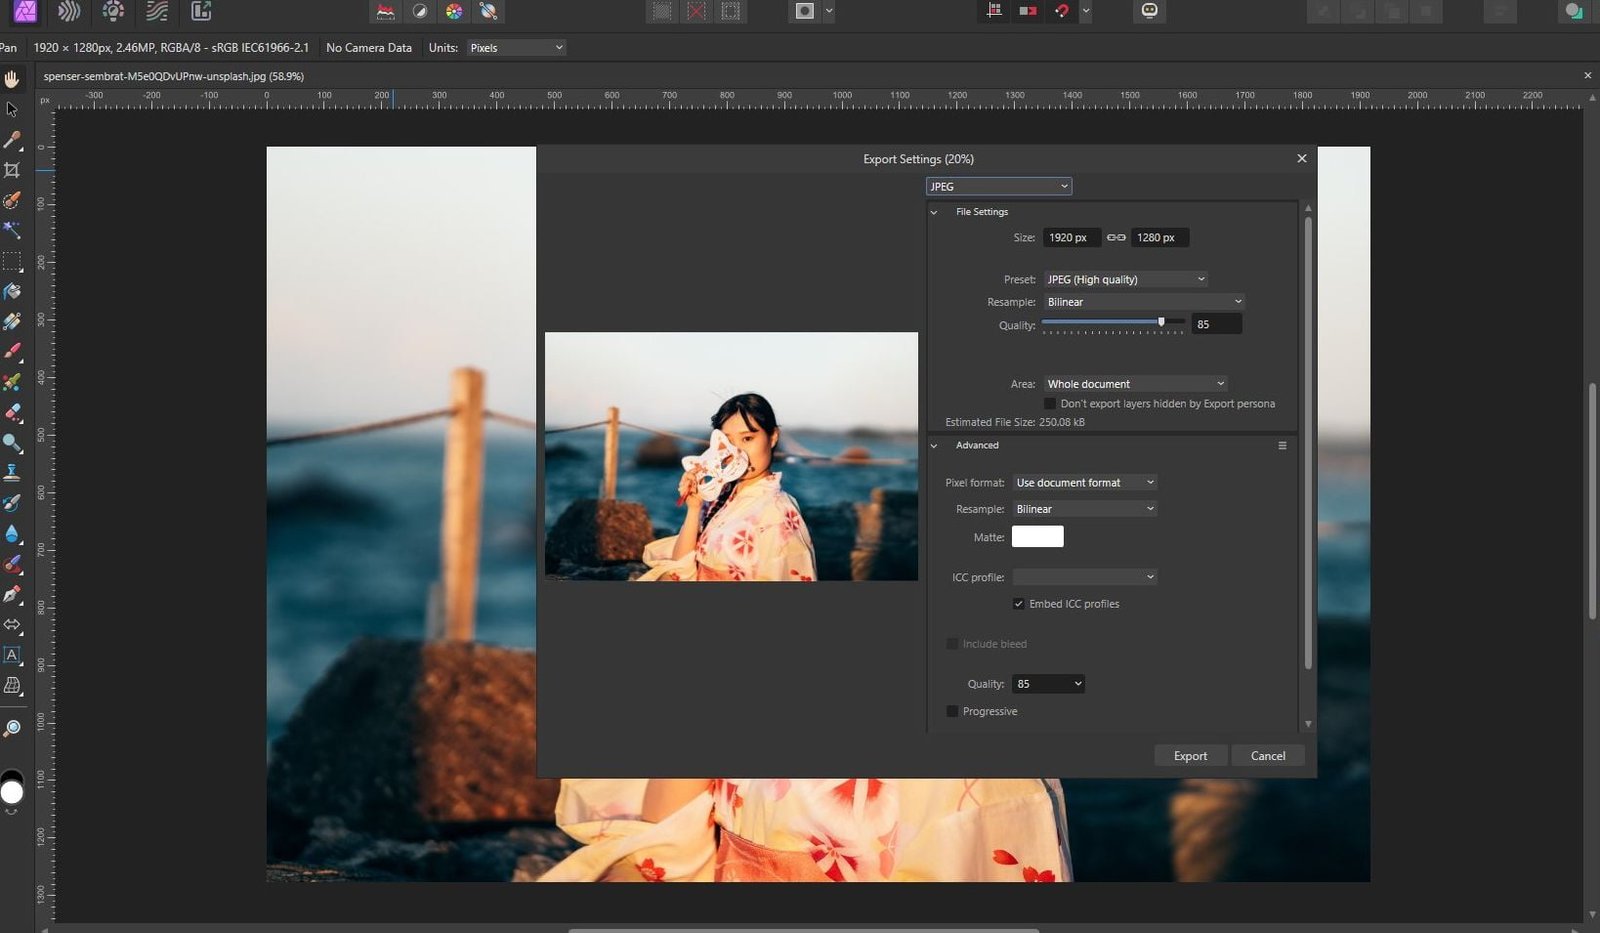
From here, you can simply press the Export button to give the file a name and find a location on your computer to save the image.
Things To Customize In The “Save As” Dialog Box
Understanding the basics of the Save As dialog box is very important. If you’re not familiar, here are the most important parts of this window.

- From here, you can select other formats to save as, including JPEG, PNG, GIF, and even PSD and WEBp
- Change the size of the image before saving
- Select the quality preset for the image. This will determine the quality as well as the size of the image file
- Or you can manually adjust the quality of the image
- You can create a selection and choose only to save that part of the image. You can choose that option here
Why Save As .AFPHOTO Format?
JPEG is the most popular file format for saving images. But it’s often the most destructive way to save an image.
JPEG files compress your images so much that they will lose a lot of their important qualities. And it only gets worse when you save an image over and over again.
If you plan on editing an image later or even want to make adjustments at a later time, you should consider saving your files in .AFPHOTO format.
This is the default format used by Affinity Photo for saving your projects in a non-destructive way. These files allow you to open them anytime to find all your text, adjustments, and all the layers in tact. You can edit however you like and save as many times as you want without affecting the quality of the image.
Conclusion
Saving a file as a JPEG may sound like a simple task but sometimes it’s the simplest tasks that usually takes the longest to discover.
Hopefully, by now you’ve learned a shortcut or an easy way to save your files in JPEG in Affinity Photo. If not, go back up and read it again!
See again with another guide. Be sure to follow our page on Facebook and subscribe to our email list to get the latest updates.